
🏠💡 Imagine walking into your home and having it respond to your every need – lights turning on as you enter, temperature adjusting to your preference, and your favorite music playing in the background. This isn’t a scene from a sci-fi movie; it’s the reality of a smart home, and you can build one yourself!
But how? The answer lies in the powerful combination of MicroPython and Raspberry Pi Zero. These affordable and versatile tools are revolutionizing home automation, putting the power of a smart home in your hands. Whether you’re a tech enthusiast or a curious beginner, this guide will walk you through the process of creating your very own intelligent living space.
From understanding the essential components to integrating with existing platforms, we’ll cover everything you need to know. Get ready to dive into the world of smart home technology as we explore how to set up your development environment, design your system, program smart functions, and even expand your creation. Let’s embark on this exciting journey to transform your humble abode into a hub of cutting-edge technology!
Understanding the Components

What is MicroPython?
MicroPython is a lean and efficient implementation of Python 3, specifically designed for microcontrollers and embedded systems. It offers several advantages for smart home projects:
- Easy to learn and use
- Extensive library support
- Rapid prototyping capabilities
- Low memory footprint
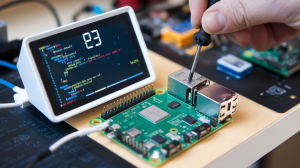
Introduction to Raspberry Pi Zero
The Raspberry Pi Zero is a compact, affordable single-board computer perfect for smart home projects. Key features include:
| Feature | Specification |
|---|---|
| Processor | 1GHz single-core CPU |
| RAM | 512MB |
| Connectivity | Mini HDMI, USB OTG |
| Size | 65mm x 30mm x 5mm |
| Price | Approximately $10 |
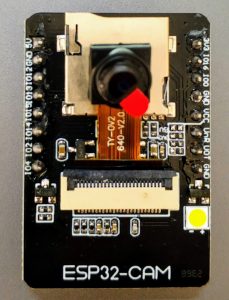
Essential smart home devices
A basic smart home system typically includes:
- Smart lights
- Temperature and humidity sensors
- Motion detectors
- Door/window sensors
- Smart plugs
- Voice assistants
Benefits of using MicroPython and Raspberry Pi Zero
Combining MicroPython with Raspberry Pi Zero offers numerous advantages for smart home projects:
- Cost-effective solution
- Flexibility in device integration
- Customizable automation
- Low power consumption
- Easy maintenance and updates
This powerful combination allows for creating a tailored smart home system that meets specific needs while maintaining affordability and efficiency. With the foundation of MicroPython and Raspberry Pi Zero, you can easily expand your smart home capabilities over time.
Setting Up Your Development Environment

A. Installing MicroPython on Raspberry Pi Zero
To begin setting up your smart home development environment, you’ll need to install MicroPython on your Raspberry Pi Zero. Follow these steps:
- Download the latest MicroPython firmware for Raspberry Pi Zero
- Flash the firmware to your Raspberry Pi Zero’s SD card
- Boot up your Raspberry Pi Zero with the flashed SD card
- Access the MicroPython REPL (Read-Eval-Print Loop) via serial connection
Here’s a comparison of MicroPython vs. standard Python for IoT projects:
| Feature | MicroPython | Standard Python |
|---|---|---|
| Memory usage | Low | Higher |
| Boot time | Fast | Slower |
| IoT compatibility | Optimized | Requires additional setup |
| Library support | Limited but growing | Extensive |
B. Configuring Wi-Fi and network settings
Once MicroPython is installed, configure your Raspberry Pi Zero’s network settings:
- Import the necessary network modules
- Set up the Wi-Fi connection using SSID and password
- Configure static IP or DHCP as needed
- Test the connection by pinging a known server
C. Essential libraries and modules
Install these crucial libraries and modules for your smart home project:
machine: for hardware controlnetwork: for Wi-Fi and network operationsurequests: for making HTTP requestsujson: for JSON data handlingtime: for time-related functions
These components will form the foundation of your smart home system, enabling you to interact with sensors, control devices, and communicate with other smart home platforms. With your development environment set up, you’re now ready to start designing your smart home system and implementing various smart home functions.
Designing Your Smart Home System

A. Identifying key automation areas
When designing your smart home system with MicroPython and Raspberry Pi Zero, it’s crucial to identify the key areas where automation can make the most impact. Consider the following areas:
- Lighting control
- Climate management
- Security and surveillance
- Energy monitoring
- Entertainment systems
| Area | Automation Benefits |
|---|---|
| Lighting | Energy savings, mood enhancement |
| Climate | Comfort, energy efficiency |
| Security | Safety, peace of mind |
| Energy | Cost reduction, sustainability |
| Entertainment | Convenience, improved experience |
B. Selecting compatible sensors and actuators
Choose sensors and actuators that are compatible with MicroPython and Raspberry Pi Zero:
- Temperature and humidity sensors
- Motion detectors
- Door/window sensors
- Light sensors
- Relays for controlling appliances
- Servo motors for automated blinds or doors
C. Creating a system architecture
Design a modular and scalable architecture for your smart home system:
- Central hub: Raspberry Pi Zero running MicroPython
- Communication protocol: MQTT for device-to-hub communication
- Data storage: Local database for storing sensor data and user preferences
- API layer: RESTful API for external integrations
D. Planning the user interface
Develop an intuitive user interface for controlling your smart home:
- Web-based dashboard for desktop and mobile access
- Voice control integration (e.g., with Google Assistant or Alexa)
- Mobile app for on-the-go control and notifications
With this system design in place, you’re ready to move on to programming your smart home functions using MicroPython on the Raspberry Pi Zero.
Programming Smart Home Functions

A. Controlling lights and appliances
Controlling lights and appliances is a fundamental aspect of any smart home system. With MicroPython and Raspberry Pi Zero, you can easily create a powerful and flexible control system. Here’s how to get started:
-
Set up GPIO pins:
- Configure the Raspberry Pi Zero’s GPIO pins to control relays or switches
- Use PWM (Pulse Width Modulation) for dimming lights
-
Create control functions:
def toggle_device(pin, state): GPIO.output(pin, state) def dim_light(pin, intensity): pwm = GPIO.PWM(pin, 100) pwm.start(intensity) -
Implement a simple user interface:
- Create a web-based interface using Flask or a similar framework
- Design a mobile app using Kivy or PyQt
| Device Type | Control Method | Example Function |
|---|---|---|
| Lights | On/Off, Dimming | toggle_device(), dim_light() |
| Appliances | On/Off | toggle_device() |
| Smart Plugs | On/Off, Power Monitoring | toggle_device(), monitor_power() |
B. Implementing temperature and humidity monitoring
Temperature and humidity monitoring is crucial for maintaining a comfortable and healthy living environment. Here’s how to implement this feature:
-
Choose a sensor:
- DHT22 or BME280 for accurate temperature and humidity readings
- Connect the sensor to the Raspberry Pi Zero’s GPIO pins
-
Write a function to read sensor data:
import adafruit_dht def read_temp_humidity(): dht = adafruit_dht.DHT22(board.D4) temperature = dht.temperature humidity = dht.humidity return temperature, humidity -
Set up data logging:
- Store readings in a database (e.g., SQLite)
- Create graphs using libraries like Matplotlib
-
Implement alerts:
- Send notifications when temperature or humidity exceeds set thresholds
- Integrate with your smart home system to adjust HVAC settings automatically
C. Setting up motion detection and security features
Integrating with Existing Smart Home Platforms

Connecting to popular smart home hubs
When integrating your MicroPython-based Raspberry Pi Zero smart home system with existing platforms, connecting to popular smart home hubs is crucial. Here’s a comparison of some widely-used hubs:
| Hub | Compatibility | Protocols | Ease of Integration |
|---|---|---|---|
| Home Assistant | Excellent | MQTT, Zigbee, Z-Wave | High |
| SmartThings | Good | Zigbee, Z-Wave | Medium |
| Apple HomeKit | Limited | HomeKit | Low |
| Google Home | Good | Wi-Fi, Bluetooth | Medium |
To connect your Raspberry Pi Zero to these hubs:
- Install the necessary libraries (e.g.,
paho-mqttfor MQTT) - Configure your device’s network settings
- Set up authentication and encryption
- Create device profiles in the hub’s interface
Implementing MQTT for device communication
MQTT (Message Queuing Telemetry Transport) is a lightweight protocol ideal for IoT devices. Here’s how to implement it:
- Install the MQTT library:
pip install paho-mqtt - Set up an MQTT broker (e.g., Mosquitto)
- Configure your Raspberry Pi Zero as an MQTT client
- Define topics for publishing and subscribing
- Implement message handling functions
Creating custom APIs for third-party integrations
To extend your smart home’s capabilities, create custom APIs:
- Choose a web framework (e.g., Flask)
- Define API endpoints for device control and data retrieval
- Implement authentication and rate limiting
- Document your API for third-party developers
- Test thoroughly before deployment
With these integrations in place, your MicroPython and Raspberry Pi Zero smart home system can now communicate seamlessly with existing platforms, enhancing its functionality and user experience. Next, we’ll explore how to optimize the performance and security of your smart home setup.
Optimizing Performance and Security

Efficient coding practices for MicroPython
When optimizing your smart home system, efficient coding practices are crucial. Here are some key techniques to enhance your MicroPython code:
- Use list comprehensions for concise and readable code
- Implement generator expressions for memory-efficient iterations
- Leverage the
gc.collect()function to manage memory usage - Minimize global variables to reduce memory consumption
- Utilize the
const()function for constants to optimize memory usage
Implementing encryption and secure communication
Security is paramount in smart home systems. Implement these measures to protect your devices and data:
- Use TLS/SSL for encrypted communication
- Implement OAuth 2.0 for secure authentication
- Employ AES encryption for sensitive data storage
- Utilize secure boot mechanisms on your Raspberry Pi Zero
| Security Measure | Purpose |
|---|---|
| TLS/SSL | Encrypt data in transit |
| OAuth 2.0 | Secure user authentication |
| AES Encryption | Protect stored data |
| Secure Boot | Ensure device integrity |
Regular software updates and maintenance
Keeping your smart home system up-to-date is essential for optimal performance and security. Establish a routine maintenance schedule that includes:
- Regular firmware updates for all connected devices
- Periodic security audits of your system
- Monitoring system logs for unusual activity
- Backing up your configuration and data regularly
Troubleshooting common issues
Even well-designed systems can encounter problems. Here are some common issues and their solutions:
- Connectivity problems: Check Wi-Fi signal strength and router settings
- Device unresponsiveness: Implement watchdog timers to auto-restart devices
- Slow performance: Optimize code and reduce polling intervals
- False sensor readings: Implement data filtering and calibration routines
By following these optimization and security practices, you’ll ensure your MicroPython and Raspberry Pi Zero smart home system runs smoothly and securely. Next, we’ll explore how to expand your smart home system with additional devices and functionalities.
Expanding Your Smart Home System

Adding new devices and sensors
As your smart home system evolves, you’ll want to expand its capabilities by incorporating new devices and sensors. Here’s a guide to seamlessly integrate additional components:
-
Identify compatible devices:
- Research IoT devices that support MicroPython
- Look for sensors with I2C or SPI interfaces
- Consider power requirements and connectivity options
-
Update your system architecture:
- Modify your main control script to accommodate new devices
- Create separate modules for each new device type
- Implement proper error handling for device communication
| Device Type | Connectivity | Power Source | Use Case |
|---|---|---|---|
| Temperature Sensor | I2C | 3.3V | Climate control |
| Motion Detector | GPIO | 5V | Security system |
| Smart Plug | Wi-Fi | AC power | Energy management |
| Door Sensor | Bluetooth | Battery | Access monitoring |
Creating advanced automation scenarios
With an expanded device ecosystem, you can create more sophisticated automation scenarios:
-
Multi-device triggers:
- Combine inputs from multiple sensors for complex conditions
- Use logical operators (AND, OR) to define trigger criteria
-
Time-based routines:
- Implement scheduling functions for daily or weekly tasks
- Create sunrise/sunset-based automations using location data
-
Adaptive learning:
- Develop algorithms that learn from user behavior
- Implement feedback mechanisms to fine-tune automations
Developing a mobile app for remote control
Enhance your smart home’s accessibility by creating a mobile app:
-
Choose a cross-platform framework:
- React Native for JavaScript developers
- Flutter for Dart enthusiasts
- Xamarin for C# programmers
-
Design the user interface:
- Create intuitive controls for each device type
- Implement real-time status updates and notifications
-
Establish secure communication:
- Use HTTPS for API requests to your Raspberry Pi
- Implement user authentication and device pairing
Exploring machine learning possibilities
Integrate machine learning to make your smart home truly intelligent:
-
Data collection and preprocessing:
- Gather historical data from your sensors and devices
- Clean and normalize the data for analysis
-
Choose appropriate ML models:
- Decision trees for simple classification tasks
- Neural networks for complex pattern recognition
-
Implement predictive features:
- Forecast energy consumption based on usage patterns
- Predict maintenance needs for connected devices
By expanding your smart home system with these advanced features, you’ll create a more robust and intelligent living environment. The integration of new devices, sophisticated automation scenarios, mobile control, and machine learning capabilities will take your MicroPython and Raspberry Pi Zero-based smart home to the next level.

Building a smart home with MicroPython and Raspberry Pi Zero offers an exciting opportunity to create a customized, efficient, and secure living space. By understanding the components, setting up your development environment, and designing a tailored system, you can bring your smart home vision to life. Programming smart functions and integrating with existing platforms further enhances the capabilities of your setup, while optimizing performance and security ensures a smooth and protected experience.
As you embark on your smart home journey, remember that the possibilities for expansion are endless. With MicroPython and Raspberry Pi Zero as your foundation, you can continually add new features and devices to create an ever-evolving, intelligent living space that perfectly suits your needs and preferences. Start small, learn as you go, and watch your smart home grow into a personalized, cutting-edge ecosystem.

Awesome https://is.gd/N1ikS2