
Are you tired of manually managing tasks on your Raspberry Pi? 🤖 Imagine a world where your Pi works tirelessly in the background, executing commands and running scripts without your constant supervision. That’s the power of task scheduling, and it’s easier to master than you might think!
Whether you’re a hobbyist tinkerer or a seasoned developer, learning to schedule tasks on your Raspberry Pi can revolutionize your projects. From automating backups to controlling smart home devices, the possibilities are endless. But where do you start? How can you harness this potential without getting lost in complex technical jargon?
Fear not! In this guide, we’ll walk you through five simple steps to become a Raspberry Pi task scheduling pro. We’ll cover everything from understanding the basics to implementing advanced techniques, ensuring you’re equipped to optimize your Pi’s performance. Get ready to unlock a new level of efficiency and creativity with your Raspberry Pi! 🚀
Understanding Raspberry Pi and Task Scheduling

What is Raspberry Pi?
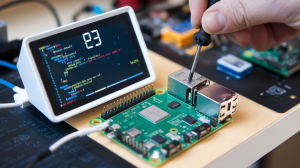
Raspberry Pi is a small, affordable, and versatile single-board computer that has revolutionized the world of DIY computing and IoT projects. Developed by the Raspberry Pi Foundation, this credit card-sized device packs impressive computing power and functionality into a compact form factor.
Key features of Raspberry Pi:
- Low-cost computing solution
- Runs various operating systems, primarily Linux-based
- GPIO pins for hardware interfacing
- Supports multiple programming languages
- Ideal for education, IoT, and hobbyist projects
| Model | CPU | RAM | USB Ports | Wi-Fi | Bluetooth |
|---|---|---|---|---|---|
| Pi 4 | Quad-core Cortex-A72 | 1-8GB | 4 USB 3.0 | Yes | Yes |
| Pi 3B+ | Quad-core Cortex-A53 | 1GB | 4 USB 2.0 | Yes | Yes |
| Pi Zero W | Single-core ARM11 | 512MB | 1 Micro-USB | Yes | Yes |
Importance of task scheduling
Task scheduling is crucial for maximizing the potential of your Raspberry Pi. It allows you to automate repetitive tasks, optimize resource usage, and ensure timely execution of important processes. By implementing effective scheduling, you can:
- Automate system maintenance
- Collect and process data at specific intervals
- Run backups without manual intervention
- Execute time-sensitive operations precisely
- Manage power consumption efficiently
Benefits of mastering Raspberry Pi scheduling
Mastering Raspberry Pi scheduling offers numerous advantages:
- Increased productivity through automation
- Enhanced project reliability and consistency
- Improved resource management and efficiency
- Greater flexibility in managing complex tasks
- Ability to create sophisticated IoT and monitoring solutions
By harnessing the power of task scheduling, you can transform your Raspberry Pi into a powerful, autonomous system capable of handling a wide range of applications and projects. Now that we understand the basics of Raspberry Pi and the importance of task scheduling, let’s explore how to set up your Raspberry Pi for effective task management.
Setting Up Your Raspberry Pi for Task Scheduling

A. Installing necessary software
To begin setting up your Raspberry Pi for task scheduling, you’ll need to install some essential software. Here’s a list of the key components:
- Cron: The primary tool for task scheduling
- Nano: A user-friendly text editor
- Python: For creating custom scripts
To install these, open your terminal and run:
sudo apt-get update
sudo apt-get install cron nano python3
B. Configuring system settings
Proper system configuration is crucial for reliable task scheduling. Follow these steps:
-
Set the correct time zone:
sudo raspi-configNavigate to “Localisation Options” > “Change Timezone”
-
Enable SSH for remote access:
sudo raspi-configGo to “Interface Options” > “SSH” > Enable
| Setting | Importance | How to Configure |
|---|---|---|
| Time Zone | Critical | raspi-config |
| SSH | Optional | raspi-config |
| NTP | Recommended | sudo apt-get install ntp |
C. Accessing the command line interface
The command line interface (CLI) is where you’ll manage your scheduled tasks. Access it through:
- Direct connection: Use the physical terminal on your Raspberry Pi
- SSH: Connect remotely using
ssh pi@your_raspberry_pi_ip - VNC: For a graphical interface, enable VNC in raspi-config
Once in the CLI, you’re ready to start scheduling tasks using cron. In the next section, we’ll dive deeper into cron and how to use it effectively on your Raspberry Pi.
Exploring Cron: The Raspberry Pi Scheduler

Introduction to Cron syntax
Cron, the powerful task scheduler for Raspberry Pi, uses a specific syntax to define when and how often tasks should run. The cron syntax consists of five fields representing minute, hour, day of month, month, and day of week, followed by the command to execute.
| Field | Values | Special Characters |
|---|---|---|
| Minute | 0-59 | * , – / |
| Hour | 0-23 | * , – / |
| Day of Month | 1-31 | * , – / |
| Month | 1-12 or JAN-DEC | * , – / |
| Day of Week | 0-7 or SUN-SAT | * , – / |
Special characters allow for more complex scheduling:
*: Any value,: Value list separator-: Range of values/: Step values
Creating your first Cron job
To create a cron job on your Raspberry Pi:
- Open the terminal
- Type
crontab -eto edit the crontab file - Choose your preferred text editor
- Add your cron job using the syntax:
* * * * * command_to_run - Save and exit the editor
For example, to run a script every day at 3:30 PM:
30 15 * * * /home/pi/myscript.sh
Editing and managing Cron tasks
To manage your cron jobs effectively:
- List all cron jobs:
crontab -l - Remove all cron jobs:
crontab -r - Edit existing jobs:
crontab -e
When editing, you can:
- Comment out jobs with
# - Modify the schedule or command
- Add new jobs or remove existing ones
Viewing and interpreting Cron logs
Cron logs are essential for troubleshooting and monitoring your scheduled tasks. To view cron logs on Raspberry Pi:
- Check system logs:
grep CRON /var/log/syslog - View real-time logs:
tail -f /var/log/syslog | grep CRON
Interpret log entries to understand:
- When tasks ran
- Which tasks executed successfully
- Any errors or issues encountered
Now that you’ve learned about cron, let’s explore some advanced scheduling techniques to take your Raspberry Pi task automation to the next level.
Advanced Scheduling Techniques

Using systemd timers
Systemd timers offer a more flexible and powerful alternative to traditional cron jobs on Raspberry Pi. These timers can trigger systemd services at specific times or intervals, providing greater control and reliability.
Key advantages of systemd timers:
- Precise timing control
- Dependency management
- Logging and status tracking
- Ability to run missed jobs
To create a systemd timer:
- Create a service file (e.g.,
myservice.service) - Create a timer file (e.g.,
myservice.timer) - Enable and start the timer
| File Type | Example Content |
|---|---|
| Service | [Service]<br>ExecStart=/path/to/your/script.sh |
| Timer | [Timer]<br>OnCalendar=*-*-* 02:00:00<br>[Install]<br>WantedBy=timers.target |
Implementing at and batch commands
The at and batch commands provide one-time task scheduling on Raspberry Pi. While at executes commands at a specified time, batch runs jobs when system load permits.
Usage examples:
at 2:00 AM tomorrow
batch
These commands are ideal for:
- Running backups
- Performing system maintenance
- Executing resource-intensive tasks during off-peak hours
Leveraging Python for complex scheduling
Python offers powerful libraries like schedule and APScheduler for implementing sophisticated scheduling logic on Raspberry Pi. These libraries allow for:
- Interval-based scheduling
- Cron-like scheduling
- Event-driven task execution
Example using the schedule library:
import schedule
import time

def job():
    print("Executing scheduled task")

schedule.every(10).minutes.do(job)
schedule.every().hour.do(job)
schedule.every().day.at("10:30").do(job)

while True:
    schedule.run_pending()
    time.sleep(1)
Python-based scheduling is particularly useful for complex scenarios requiring dynamic scheduling or integration with other Python-based Raspberry Pi projects.
Optimizing and Troubleshooting Your Scheduled Tasks

Monitoring task performance
To ensure your scheduled tasks are running efficiently on your Raspberry Pi, it’s crucial to monitor their performance. Here are some key metrics to track:
- CPU usage
- Memory consumption
- Execution time
- Success/failure rate
Use the following command to monitor real-time task performance:
top -u [username]
For a more detailed analysis, consider using tools like htop or glances.
| Tool | Advantages | Disadvantages |
|---|---|---|
| top | Built-in, simple | Limited visual information |
| htop | User-friendly, colorful interface | Requires installation |
| glances | Comprehensive system monitoring | More complex to use |
Debugging common scheduling issues
When troubleshooting Raspberry Pi task scheduling problems, consider these common issues:
- Incorrect crontab syntax
- Path-related errors
- Permission problems
- Conflicting schedules
To debug, check your cron logs:
grep CRON /var/log/syslog
Best practices for efficient scheduling
- Group similar tasks together
- Avoid scheduling resource-intensive tasks simultaneously
- Use absolute paths in your cron jobs
- Test your scripts before scheduling them
Automating task error notifications
Set up email notifications for failed tasks:
- Install
msmtp:sudo apt-get install msmtp msmtp-mta - Configure
msmtpwith your email settings - Add this line to your crontab:
MAILTO=your@email.com
Now that you’ve optimized your scheduled tasks and set up error notifications, you’re well-equipped to maintain a smooth-running Raspberry Pi system. Next, we’ll recap the key points and provide some final thoughts on mastering Raspberry Pi task scheduling.

Mastering Raspberry Pi task scheduling is a valuable skill that can significantly enhance your project’s efficiency and automation capabilities. By following the five easy steps outlined in this guide, you’ve learned how to set up your Raspberry Pi, harness the power of Cron, implement advanced scheduling techniques, and optimize your scheduled tasks.
Now that you’re equipped with these essential skills, it’s time to put them into practice. Start by implementing simple scheduled tasks and gradually progress to more complex automation projects. Remember to regularly review and fine-tune your scheduled tasks to ensure optimal performance and reliability. With your newfound expertise in Raspberry Pi task scheduling, you’re well-prepared to tackle a wide range of exciting projects and unlock the full potential of your Raspberry Pi.


Very good https://dub.sh/LAqZ3qv
Awesome https://t.ly/tndaA
Awesome https://rb.gy/4gq2o4
Very good https://rb.gy/4gq2o4
Good https://rb.gy/4gq2o4
Very good https://is.gd/N1ikS2
Very good https://is.gd/N1ikS2
Awesome https://is.gd/N1ikS2
Very good https://is.gd/N1ikS2
Good https://is.gd/N1ikS2
Awesome https://is.gd/N1ikS2
Good https://is.gd/N1ikS2
Awesome https://is.gd/N1ikS2
Awesome https://is.gd/N1ikS2
Good https://is.gd/N1ikS2
Good https://is.gd/N1ikS2