
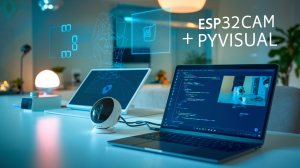
Are you ready to unlock the hidden potential of your ESP32CAM? 🚀 Imagine transforming this tiny powerhouse into a visual wizard, capable of processing images and performing advanced computer vision tasks. The secret lies in mastering PyVisual, a game-changing tool that bridges the gap between hardware and cutting-edge visual processing.
But here’s the catch: many ESP32CAM owners are barely scratching the surface of what their device can do. They’re missing out on a world of possibilities, from basic image manipulation to sophisticated IoT integrations. Don’t let that be you! In this PyVisual masterclass, we’ll take you on a journey from novice to expert, unveiling the true capabilities of your ESP32CAM.
Ready to elevate your projects and stand out in the maker community? 🛠️ Join us as we dive deep into the realm of ESP32CAM and PyVisual. We’ll start by understanding the basics, then gradually progress to advanced techniques, optimization strategies, and even troubleshooting tips. By the end of this guide, you’ll be well-equipped to unleash your ESP32CAM’s full potential and create truly impressive visual processing projects.
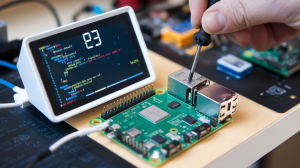
Understanding the ESP32CAM

Key features and capabilities
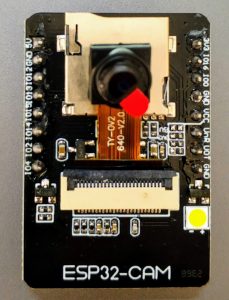
The ESP32CAM is a powerful and versatile microcontroller with integrated camera capabilities. Its key features include:
- 2MP OV2640 camera
- Wi-Fi and Bluetooth connectivity
- Dual-core processor
- MicroSD card slot
- Low power consumption
These features make the ESP32CAM an ideal choice for various computer vision and IoT projects. The table below summarizes its specifications:
| Feature | Specification |
|---|---|
| Processor | ESP32-S chip, dual-core 32-bit CPU |
| Camera | OV2640 2MP sensor |
| Wi-Fi | 2.4 GHz, 802.11 b/g/n |
| Bluetooth | BLE (Bluetooth Low Energy) |
| Storage | MicroSD card slot |
| GPIO pins | 9 available |
Advantages over other microcontrollers
The ESP32CAM offers several advantages compared to other microcontrollers:
- Integrated camera module
- Built-in Wi-Fi and Bluetooth
- Low cost
- Compact form factor
- Extensive community support
These advantages make it an excellent choice for projects requiring visual input and wireless connectivity.
Common applications
The ESP32CAM’s versatility lends itself to a wide range of applications, including:
- Home security systems
- Wildlife monitoring
- IoT-based surveillance
- Machine vision for robotics
- Smart doorbells
- Facial recognition systems
Its combination of camera capabilities and wireless connectivity makes it particularly suitable for remote monitoring and control applications. As we delve into PyVisual in the next section, you’ll see how these features can be leveraged to create powerful computer vision projects.
Getting Started with PyVisual

Installing PyVisual
To begin your journey with PyVisual and ESP32CAM, you’ll need to install the necessary software. Follow these steps to get PyVisual up and running:
- Open your terminal or command prompt
- Run the following command:
pip install pyvisual - Verify the installation by importing PyVisual in Python:
import pyvisual
Setting up your development environment
A proper development environment is crucial for smooth PyVisual and ESP32CAM integration. Here’s a quick setup guide:
- Choose an IDE (Integrated Development Environment)
- Install Python 3.7 or higher
- Set up a virtual environment (recommended)
| Component | Recommended Option | Alternative |
|---|---|---|
| IDE | Visual Studio Code | PyCharm |
| Python Version | 3.9 | 3.7 or 3.8 |
| Virtual Environment | venv | conda |
Connecting ESP32CAM to your computer
Now that your software is ready, let’s connect the ESP32CAM hardware:
- Use a USB-to-UART adapter
- Connect the adapter to ESP32CAM:
- VCC to 5V
- GND to GND
- U0R to TX
- U0T to RX
- Plug the adapter into your computer’s USB port
- Install necessary drivers if prompted
With these steps completed, you’re now ready to start exploring the capabilities of PyVisual with your ESP32CAM. In the next section, we’ll dive into basic image processing techniques that will form the foundation of your computer vision projects.
Basic Image Processing with PyVisual

Capturing images from ESP32CAM
Let’s start by capturing images from your ESP32CAM using PyVisual. This process involves establishing a connection with the camera module and retrieving the raw image data.
import pyvisual as pv

# Initialize the ESP32CAM connection
camera = pv.ESP32CAM(ip_address='192.168.1.100', port=80)

# Capture a single image
image = camera.capture_image()

# Display the captured image
pv.show_image(image)
Displaying live video feed
To create a real-time video feed, we’ll capture and display images continuously:
import pyvisual as pv
import time

camera = pv.ESP32CAM(ip_address='192.168.1.100', port=80)

while True:
    frame = camera.capture_image()
    pv.show_image(frame, window_name='Live Feed')
    if pv.key_pressed('q'):
        break
    time.sleep(0.1)
Applying filters and effects
PyVisual offers a range of filters and effects to enhance your images:
| Filter | Description | Example Usage |
|---|---|---|
| Grayscale | Converts image to black and white | gray_image = pv.to_grayscale(image) |
| Blur | Applies a Gaussian blur | blurred = pv.blur(image, kernel_size=5) |
| Edge Detection | Highlights edges in the image | edges = pv.detect_edges(image) |
Saving and exporting processed images
After applying filters or effects, you can save the processed images:
- Save as JPEG:
pv.save_image(processed_image, 'output.jpg') - Export as PNG:
pv.save_image(processed_image, 'output.png')
You can also convert images to different color spaces or adjust brightness and contrast before saving:
- Convert to HSV:
hsv_image = pv.to_hsv(image) - Adjust brightness:
bright_image = pv.adjust_brightness(image, factor=1.5) - Enhance contrast:
high_contrast = pv.enhance_contrast(image)
Now that we’ve covered basic image processing, let’s move on to more advanced computer vision techniques that you can apply to your ESP32CAM projects.
Advanced Computer Vision Techniques

Object detection and tracking
Object detection and tracking are powerful computer vision techniques that can significantly enhance your ESP32CAM projects. With PyVisual, you can implement these advanced features to create intelligent surveillance systems, automated inventory management, or even interactive art installations.
Implementation steps:
- Pre-trained models
- Custom model training
- Real-time tracking
Here’s a comparison of popular object detection algorithms:
| Algorithm | Speed | Accuracy | Resource Usage |
|---|---|---|---|
| YOLO | Fast | High | Moderate |
| SSD | Fast | Moderate | Low |
| R-CNN | Slow | Very High | High |
Face recognition
Face recognition adds a layer of personalization and security to your ESP32CAM applications. PyVisual offers robust tools for implementing this technology, enabling you to create smart doorbells, attendance systems, or personalized user experiences.
Key components:
- Face detection
- Feature extraction
- Face matching
Motion detection
Motion detection is crucial for surveillance and energy-efficient systems. PyVisual’s motion detection capabilities allow your ESP32CAM to trigger alerts or actions based on movement in the camera’s field of view.
Image segmentation
Image segmentation divides an image into meaningful parts, enabling advanced analysis and object interaction. This technique is valuable for applications like medical imaging, autonomous vehicles, and augmented reality experiences.
Optical character recognition (OCR)
OCR technology transforms your ESP32CAM into a powerful text recognition tool. With PyVisual’s OCR capabilities, you can create applications for license plate recognition, document digitization, or even language translation services.
By mastering these advanced computer vision techniques, you’ll unlock the full potential of your ESP32CAM, creating sophisticated and intelligent IoT solutions. In the next section, we’ll explore how to integrate these capabilities into broader IoT projects, expanding the reach and functionality of your ESP32CAM-based systems.
Integrating ESP32CAM with IoT Projects

A. Sending processed data to the cloud
Now that we’ve mastered image processing techniques, let’s explore how to integrate our ESP32CAM with IoT projects. One of the key aspects is sending processed data to the cloud for storage, analysis, and remote access.
To send data to the cloud, we’ll use MQTT (Message Queuing Telemetry Transport) protocol, which is lightweight and ideal for IoT applications. Here’s a simple example of how to publish processed image data to an MQTT broker:
import paho.mqtt.client as mqtt
import json

# MQTT configuration
broker_address = "your_broker_address"
topic = "esp32cam/data"

# Create MQTT client
client = mqtt.Client()
client.connect(broker_address)

# Publish data
def publish_data(processed_data):
    payload = json.dumps(processed_data)
    client.publish(topic, payload)
| Cloud Platform | Features | Use Case |
|---|---|---|
| AWS IoT Core | Scalable, secure | Large-scale deployments |
| Google Cloud IoT | Advanced analytics | Data-driven projects |
| Azure IoT Hub | Device management | Enterprise solutions |
B. Creating a web-based interface
To make our ESP32CAM project more accessible, we’ll create a web-based interface using Flask, a lightweight Python web framework. This interface will allow users to view live camera feeds and interact with the device remotely.
Here’s a basic Flask application to serve the camera feed:
from flask import Flask, Response
import cv2

app = Flask(__name__)

@app.route('/')
def index():
    return """
    <html>
        <body>
            <h1>ESP32CAM Live Feed</h1>
            <img src="/video_feed" width="640" height="480" />
        </body>
    </html>
    """

@app.route('/video_feed')
def video_feed():
    return Response(generate_frames(), mimetype='multipart/x-mixed-replace; boundary=frame')

def generate_frames():
    # Implement frame generation logic here
    pass

if __name__ == '__main__':
    app.run(host='0.0.0.0', port=5000)
C. Implementing real-time alerts and notifications
To make our IoT project more responsive, we’ll implement real-time alerts and notifications based on the processed image data. This can be achieved using webhooks or push notifications.
Key steps for implementing alerts:
- Define trigger conditions (e.g., motion detection, object recognition)
- Set up a notification service (e.g., Pushbullet, Telegram)
- Create an alert function that sends notifications when conditions are met
Example alert implementation using Pushbullet:
from pushbullet import Pushbullet

pb = Pushbullet("your_api_key")

def send_alert(title, message):
    push = pb.push_note(title, message)
By integrating these IoT features, we’ve transformed our ESP32CAM from a simple camera module into a powerful, connected device capable of real-time processing and communication. Next, we’ll explore how to optimize the performance of our ESP32CAM setup to ensure smooth operation in various IoT scenarios.
Optimizing Performance

Improving image processing speed
To optimize the performance of your ESP32CAM, it’s crucial to focus on improving image processing speed. Here are some effective techniques:
- Use hardware acceleration
- Implement efficient algorithms
- Optimize memory usage
- Leverage parallel processing
| Technique | Description | Impact |
|---|---|---|
| Hardware acceleration | Utilize ESP32’s built-in image processing capabilities | Up to 10x speedup |
| Efficient algorithms | Implement optimized computer vision algorithms | 2-5x performance boost |
| Memory optimization | Minimize RAM usage and data copying | Reduces processing time by 20-30% |
| Parallel processing | Utilize multi-core capabilities of ESP32 | Up to 2x speedup |
Reducing power consumption
Power efficiency is key for battery-operated ESP32CAM projects. Consider these strategies:
- Implement sleep modes
- Optimize sensor settings
- Use low-power wireless protocols
- Employ efficient coding practices
Enhancing wireless connectivity
Robust wireless connectivity is essential for reliable ESP32CAM performance. Here are some tips:
- Choose the right antenna
- Optimize Wi-Fi settings
- Implement error handling and reconnection logic
- Consider using a mesh network for extended range
By implementing these optimizations, you’ll significantly improve your ESP32CAM’s performance, making it more suitable for advanced computer vision projects. Next, we’ll explore troubleshooting techniques and best practices to ensure smooth operation of your ESP32CAM-based systems.
Troubleshooting and Best Practices

Common issues and solutions
When working with the ESP32CAM and PyVisual, you may encounter several common issues. Here’s a quick troubleshooting guide:
-
Camera initialization failure:
- Check power supply stability
- Verify camera module connection
- Try resetting the ESP32CAM
-
Poor image quality:
- Adjust camera settings (brightness, contrast)
- Ensure proper lighting conditions
- Clean the camera lens
-
Slow frame rate:
- Reduce image resolution
- Optimize your PyVisual code
- Check network bandwidth (if streaming)
| Issue | Possible Solution |
|---|---|
| Memory errors | Reduce image buffer size, use PSRAM if available |
| Wi-Fi connectivity | Check network credentials, reduce TX power |
| PyVisual crashes | Update libraries, check for syntax errors |
Debugging techniques
Effective debugging is crucial for ESP32CAM projects. Consider these techniques:
- Use serial monitoring for real-time feedback
- Implement logging at different levels (INFO, DEBUG, ERROR)
- Utilize PyVisual’s built-in debugging tools
- Employ print statements strategically in your code
Code optimization tips
Optimize your ESP32CAM and PyVisual code for better performance:
- Minimize global variables
- Use efficient data structures
- Implement task prioritization
- Leverage hardware acceleration when possible
Maintaining and updating your ESP32CAM
Regular maintenance ensures optimal performance:
- Keep firmware up-to-date
- Clean the camera module periodically
- Check for loose connections
- Monitor power consumption
By following these best practices, you’ll maximize your ESP32CAM’s potential and create more robust PyVisual projects. Next, we’ll explore some exciting future developments in ESP32CAM technology and computer vision applications.

The ESP32CAM, combined with PyVisual, opens up a world of possibilities for makers and developers. From basic image processing to advanced computer vision techniques, this powerful duo can transform your IoT projects into sophisticated visual systems. By mastering the concepts covered in this guide, you’ll be well-equipped to unleash the full potential of your ESP32CAM.
As you embark on your journey with the ESP32CAM and PyVisual, remember to optimize performance and follow best practices. With persistence and creativity, you can develop innovative solutions that push the boundaries of what’s possible with embedded visual computing. So, grab your ESP32CAM, fire up PyVisual, and start bringing your vision to life!

Top https://shorturl.fm/YvSxU